Monday, February 24, 2014

Vietnamese Chicken Banh Mi


 Vietnamese food is quickly becoming one of my favorites to cook and eat! I think I like how it uses a lot of fresh flavors and veggies. The Banh Mi Sandwich can also be made with pork, but I needed to use up some chicken, so I found this recipe and adapted it to my liking.


Ingredients:

1 lb. chicken tenders, cut into bite size pieces
4 tsp olive oil
garlic powder
salt and pepper
cilantro, chopped
jalapeno, sliced
cucumbers, sliced
pickled carrots (recipe below)
4 tbsp low-sodium soy sauce
2 tbsp balsamic vinegar
6 tbsp water
Sriracha, to taste
Bread – I used crusty french bread


Directions:
Make pickled carrots the night before: Place about 1½ cups of shredded carrots in a container. Dissolve 2 tbsp sugar in ½ cup warm water. Add 1 cup white vinegar. Cover carrots with mixture and let marinate at least two hours but preferably over night.

Heat 4 tsp olive oil over medium heat. Season chicken well with salt, pepper, and garlic powder. Cook chicken over medium heat until cooked through, about 10 minutes. Set aside.


Prepare sauce: combine 4 tbsp low-sodium soy sauce with 2 tbsp balsamic vinegar and 6 tbsp water. Add a few squirts of sriracha, depending on how spicy you want the sauce. 


Toast bread in the oven, at 350*, for a few minutes to make it nice and crispy. 

On toasted bread spoon 1 tbsp sauce mixture on each side of bread. Top with chicken and pile on the cucumber, cilantro, jalapeno, and carrots. Top sandwich with sriracha and serve with additional sauce.


Friday, February 21, 2014

Friday Funny

It has been a while since I have done a Friday Funny. I've kinda had a rough group of kiddos and have had to use my "teacher voice" a lot.

This week was Kindness week at school. I made an effort to be kind, listen more, and have a little more patience.  In turn, I was able to laugh a little more!

We were learning about stars.
Me- What are stars made of?
Kid- Farts
Me- Not appropriate!
Kid- Well, they are made out of gas!

Thursday, February 20, 2014

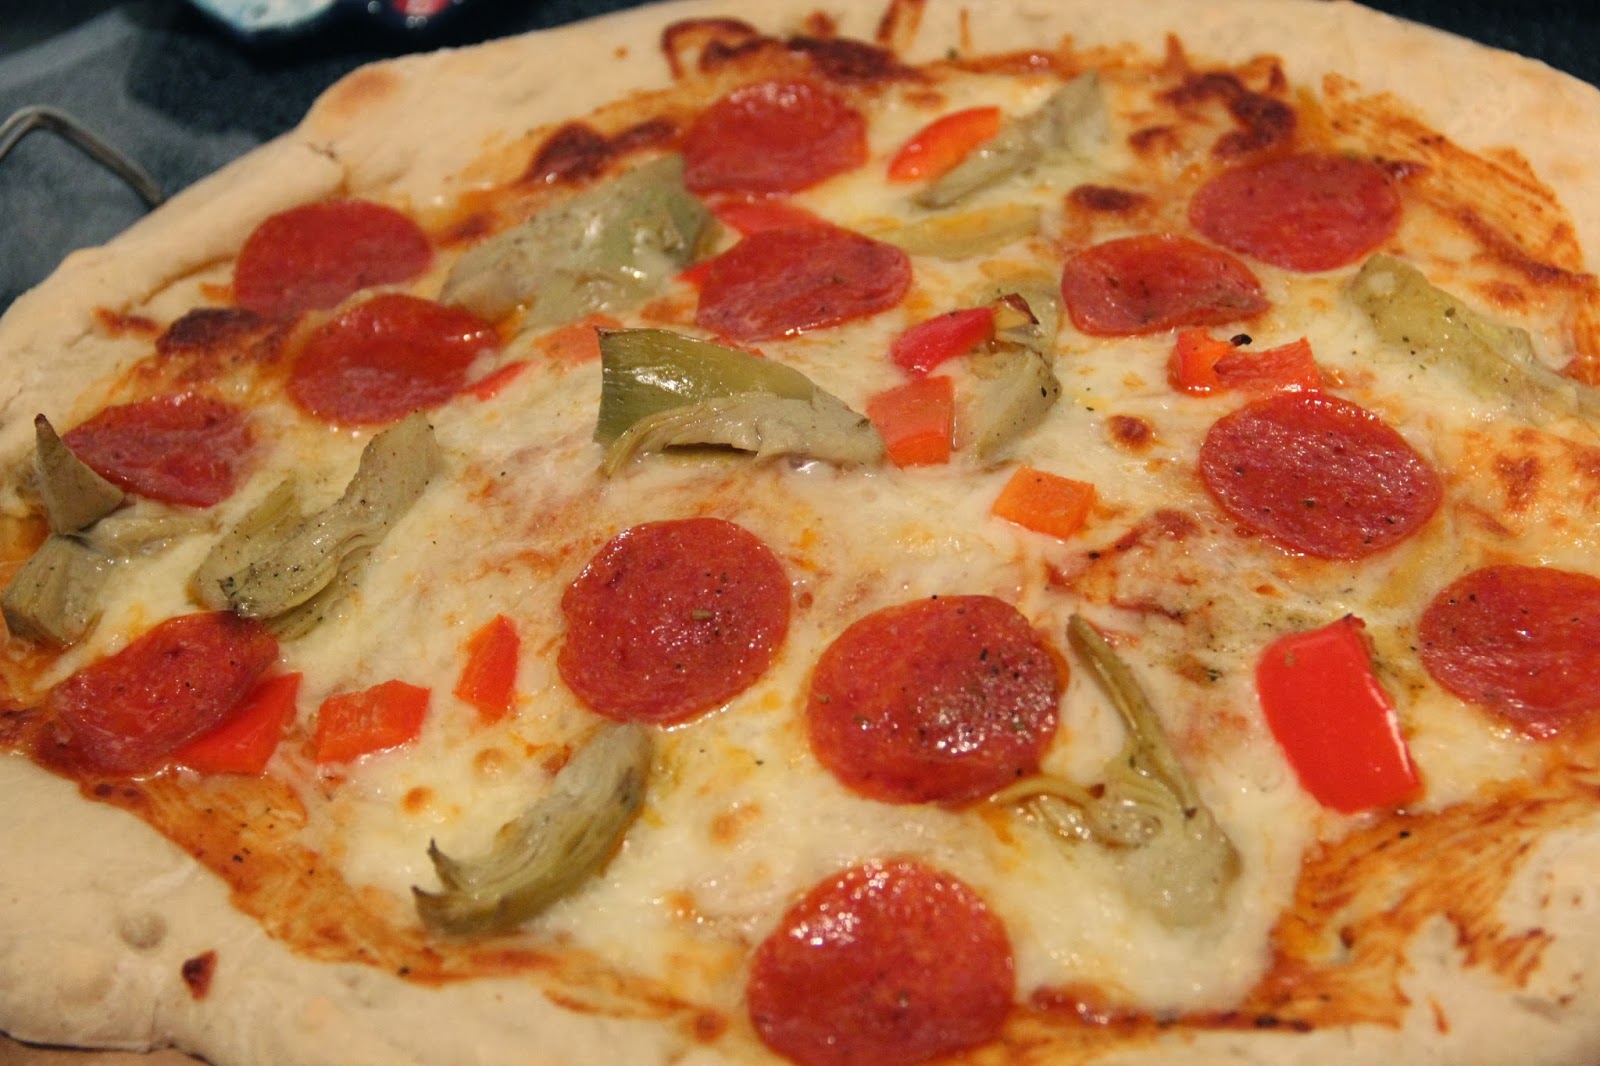
Kitchen Aid Pizza Dough

After my successful bread in my Kitchen Aid Mixer, I thought I would try my hand at pizza dough. This one of those things that I have failed at in the past. I have trouble getting it to rise. I think I have found the keys to success!
1.  The oven trick! Turn your oven to the lowest setting for 5 minutes. Then turn off your oven, and put the dough in the oven to rise
2. Make sure that your water is between 105*-110*F


This is a quick and easy dough. It makes one 14 inch pizza, or two smaller pizzas.

Ingredients:
1 package of active dry yeast
1 cup of 105* Water
1/2 teaspoon of salt
2 teaspoons of olive oil
2 1/2 to 3 cups of flour
cornmeal

Directions 
In the mixing bowl, add the yeast and the water. Let the yeast dissolve. Add the salt, olive oil, and 2 1/2 cups of flour. 

Attach the dough hook and mix on speed 2 for 1 minute. Add the remaining flour (I only need 1/2 cup more) until the dough clings to the hook and cleans the sides of the bowl. Knead in the mixer, about 4 minutes.


Place the dough in a greased bowl and let rise for 1 hour. Once risen, punch down dough.
  Brush a pizza stone with olive oil and cornmeal. 

Stretch dough across the pizza stone. 
Bake the pizzas without toppings for 5-10 minutes in an oven that has been preheated to 450*. Take the prebaked pizzas out and top them. Bake for another 10 minutes or until the cheese is melted and the edges of the pizza are browned and firm. 


I topped mine with red peppers, pepperoni, cheese, and artichokes.

Adapted from The Kitchen Aid Instruction Guide

Wednesday, February 19, 2014

Stacked Chicken Enchiladas

One of my goals this year is to try new healthier recipes. I have a subscription to Cooking Light, and have torn out many recipes! This week for my menu planning, I went off of ones that I had recently torn out of my magazines.


These stacked chicken enchiladas were yummy, but a little more work than I thought they would be. I think part of it was that I bought the cheap chicken ($1.77 for 1.5 lbs!)... with skin and bones and had to remove the skin and then de-bone the cooked chicken! I think you could probably make this with rotisserie chicken and speed up the process! I also had a major spill with the salsa Verde, did not have the limes that the recipe called for, the paper towels fell in the sink, and the salt and pepper shakers fell on my candle and shattered it!  Not my day! :)


Ingredients: 
2 tablespoons canola oil
1.5 lbs chicken thighs
1 t. ground cumin
1/2 t. kosher salt
1/4 t. ground red pepper
1 white onion chopped
8 garlic cloves, minced
1 (15-ounce) can organic whole peeled tomatoes, un-drained
1 cup chopped fresh cilantro, divided
1 16 oz jar of salsa Verde
Cooking spray
corn tortillas
Shredded pepper-Jack cheese
1/2 cup fresh tomato


Directions: 
  1. Place a small roasting pan in oven. Preheat oven to 425° (leave roasting pan in oven as it preheats).
  2. Heat a large skillet over medium-high heat. Add oil to pan; swirl to coat. Sprinkle both sides of chicken evenly with cumin, salt, and pepper. Add chicken to pan; sauté 3 minutes. Turn chicken over, and place in the preheated roasting pan. Add onion, garlic, and tomatoes to pan; bake at 425° for 15 minutes or until chicken is done. 
  3. Cool. Shred chicken (remove bones if necessary); toss with tomato mixture. (I used a mixer to shred my chicken and chop up the whole tomatoes a bit)
  4. Combine 3/4 cup cilantro and salsa verde; spread 1/4 cup salsa mixture in the bottom of an 11 x 7-inch glass or ceramic baking dish coated with cooking spray. 
  5. Top with tortillas, half of chicken mixture, and 1/4 cup salsa mixture. 
  6. Repeat layers. 
  7. Top with remaining tortillas and remaining salsa mixture; sprinkle evenly with cheese and fresh tomatoes. 
  8. Bake at 425° for 15 minutes or until golden; sprinkle with remaining cilantro. 

** I made this in 2 8x8 pans, and froze half of it


Adapted from: Julianna Grimes, Cooking Light
MARCH 2014

Tuesday, February 18, 2014

Six Hour Mixer Bread


WARNING: THIS BREAD TAKES FOREVER BUT IS SOOO GOOD!
When you are stuck at home on a snow day, it is the perfect thing to keep you busy! 


Ingredients:

3 3/4 cups of flour
1 tablespoon of salt
2 teaspoons of dry yeast
2 cups of warm water at around 105*F

Directions:
Mix flour, yeast, and salt in Kitchen Aid Mixer Bowl. 

With paddle attachment, mix on low for 1 minute.

Add warm water, mix until combined, let rest for 10-20 minutes.

Mix on speed 6 for 7 minutes.

Remove dough from paddle attachment, and attach the hook.

With the hook, mix on speed 8 until the bottom of the bowl is clean (about 12 minutes). Mix for an additional minute.

In a large, deep bowl, spray cooking spray. Place dough in the bowl, and cover with plastic and a clean kitchen towel. The dough will be sticky, handle with wet hands.

Sit in a warm place (turn on oven to lowest temp for 5 minutes, and turn off) and let the dough rise for 2-3 hours. Wet the counter and lay 2 sheets of plastic wrap on it. Sprinkle flour on top of the plastic wrap. Pour dough onto it.

Split it into 2 loaves, and shape into ciabatta shape. Cover the loaf with flour.

Spray a cookie sheet with cooking spray and set parchment paper on top. Pick up the plastic, and flip it onto the cookie sheet.

Let it rest for 1 hour.


Preheat the oven to 425* and lay a baking sheet full of water on the bottom rack of your oven, to help steam the loaves.

Bake for 30-35 minutes. Cool and enjoy your hard work!


Watch how hard your mixer has to work! :) 

Monday, February 17, 2014

Baseball Onesie

If you are a season ticket holder to the Royals, you are a dedicated fan! I made this cute onesie for one of my friends who is just that! She is expecting a baby boy in April. I had to personalize it with their last name on the back!


I manipulated a baseball that came with the Silhouette program to create the stitches. I cut it out on red flocked heat transfer vinyl using my Silhouette.


 I also found a really cute baseball pacifier to add to the gift set!

Girl Version & this version available at www.etsy.com/shop/createcookteach 

Wednesday, February 12, 2014

My Olympian


With the Olympics going on, I was inspired to do a little research on my Grandma Becky.  She competed in the 1948 Winter Olympics! 

1948 Winter Olympics
St. Moritz, Switzerland

After a 12-year break, the Olympic Winter games took place for the first time since World War II. They chose St. Moritz because the sites they had used for the 1928 Olympics were still available, meaning they could quickly organize the games.  Germany was the host to the 1936 Olympics, but was not even considered, because of the war. Japan was not invited to these Olympics. The 1948 Olympics had 730 participants.  Only 80 of them being women.

My grandmother, Rebecca Ann Cremer, participated in these Olympics.  She was a member and captain of the Middlebury College Women’s Ski team. She participated in two events. Both events were debut events. The Alpine combine had been in the 1936 Olympics, but this time there were three events for both men and women. First they competed in a downhill race (which was also its own competition) followed by 2 slalom heats. Thirty-seven skiers from 11 different nations competed in the downhill event. Twenty-eight skiers from 10 different nations competed in the Alpine Combined event. While grandma didn’t medal, Gretchen Fraser was the first American skier to win gold!


Women’s Alpine Combined  
17th Place
First Run69.4 
Second Run72.5 
Time141.9 
Difference (from Gold)+23.8 
Points11.9

They used the downhill time to calculate the points.
Downhill Points: 10.11
Slalom Points: 11.90
Total Points: 22.01


Women’s Downhill

22nd Place
Time: 2:44.2
Difference (From Gold) +15.9


Sources:


olympics.org

Tuesday, February 11, 2014

Valentines Tea Towels

I made these last year with red heat transfer vinyl. I wanted to add a little sparkle this year, and made them with my pink glitter vinyl! They turned out so cute!

Monday, February 10, 2014

Be Still & Know That I Am God


 My cousin Tiffany asked me if I could make her a sign. I told her she could come over and we could do it together! We made a trip to Hobby Lobby and spent $7.15 on paint, 2 canvases, and paint brushes. 

We came home and designed the sign on my Silhouette. Then it was time to cut it out. I had successfully used my stencil vinyl, and was excited to use it, however, it was not big enough for the canvas we bought! So then we tried contact paper, and my machine was not having it. Finally, I settled on some vinyl. We would use one as a stencil, and use the vinyl from the other one.  She wanted to make her friend one too! 

After carefully putting the stencil on we painted it with acrylic paints. 
 She wanted the GOD part to be distressed, I think we did a pretty good job!
It was not super centered, so I drew a little design in the corner!

 The other one we painted the canvas, and then stuck the vinyl on. To make sure the vinyl stuck we painted it with some Modge Podge.


Sunday, February 9, 2014

Valentines


I made these valentines for some of the sweet girls in my life! 


These are the valentines I made for school! 

Thursday, February 6, 2014

Sweet Potato Chips

I love my food processor! It saves me so much time when it comes to chopping, slicing, dicing, mixing, etc. I had some sweet potatoes from my Door to Door Organics order, and sweet potato chips sounded good. I really wanted some like the ones from Cheeseburger in Paradise, however those are fried. 

Ingredients: 
Sweet potatoes
olive oil 
salt & pepper

Directions: 
Slice sweet potatoes in food processor (tip- press firmly on potatoes as slicing in food processor for thinner chips), or slice with a knife very thin. 

Toss with olive oil and sprinkle with salt and pepper.
Line baking sheet with foil, and spray with cooking spray.
Place chips in a single layer.

Bake at 400* for 20-25 minutes, flip half way.


Wednesday, February 5, 2014

Grilled Portobello

One of the days over break, I saw someone on TV make a grilled portobello sandwich. I thought I would give the meatless Monday a chance! It actually turned out pretty good!

Ingredients:
2 large Portobello Mushrooms
1 medium Red Onion (cut into 1/4-inch thick slices)
1/4 cup Extra Virgin Olive Oil
1/4 cup Balsamic Vinegar
Kosher Salt and freshly ground Pepper
4 ounces Swiss Cheese


Directions-
Preheat a grill or grill pan to medium-high heat. 
Clean the portobellos, remove the stems and scrape out the gills using a spoon.


Brush the mushrooms and onion with the olive oil and vinegar and season liberally with salt and pepper.

Put the mushrooms and onions on the grill, and cover and cook until the mushrooms soften and the onions begin to char, about 3 minutes. 
Uncover, flip the mushrooms and onions, and cook uncovered for 1 minute. 
Top each mushroom with  cheese. 


Cook uncovered until the cheese begins to melt, about 1 minute. Serve with our without a bun.