

Saturday, March 30, 2013
Welcome Sign
My friend Megan has a wiener dog named Chloe who she is pretty obsessed with! For her birthday I made her this cute sign. I used a staple gun to secure the string on. This is a new trick that I will keep up my sleeve. This whole project took about 15 minutes! I already had the board ready.
Twins!
I have 2 twin showers within a month of each other! So I had to get crafty! One of the mommas pinned a cute onesie pair on Pinterest, so I decided to make it for her! The shoes were just too cute to pass up!


Thursday, March 28, 2013
Days Until Sign
My mom wanted a chalkboard sign for my sisters wedding shower. I had just seen a "DAYS UNTIL" sign on a blog I follow, and knew I could whip one out quickly! The best part, between my mom and I, we had all the supplies on hand.
I started with a board, that my mom found in her basement. I sanded it down and cut it in half, so I could make one for me too!
I primed it with Zinsser 123 Primer. Then I used chalkboard spray paint to paint the entire board.
Finally, I added some white vinyl cut out using my Silhouette. Super easy! It can be used all year round with fun colored chalk!
Wednesday, March 27, 2013
Corned Beef in the Crockpot
St. Patrick's day means Corned Beef! I love making it in the crock pot, because you just let it sit all day, and by dinner time, it is ready! If you get a large one, you can make rubens too!
Ingredients:
1 pre packaged Corned Beef with spices
12 oz. dark beer
1 onion
2 cups water
Directions:
Slice the onion into wedges, and layer on the bottom of the crock pot. Add the meat (don't add the liquid from the meat) into the crock pot. Open the spice packet that is provided and sprinkle onto meat. Add beer and water. Cover and cook on low for 6 hours. If you would like, you can add cabbage on the top. This year I did a side dish of cabbage, that I wasn't that impressed with!
Tuesday, March 26, 2013
5th Grade Funnies
In the first 3 hours of being back at school, I realized that I love my job! These kids are so funny. Many of you have seen the AT&T basketball commercials, and think they are hilarious. I think they are my life! Here is a list of what I have heard today (its only 10:20!)
- I didn't take a shower today, because my cat pooped in it.
- That's called the ole' spit taste (spits in the trash can)
- My mom just drank wine and played poker all of spring break.
- I went to Manhattan. I didn't like it there. They were all KKKK-SSTTAATTEE and I'm like all KKK UUUU! (Rock Chalk!)
- Kid- Miss Cremer, Were you a scrapper in high school? Me- A what? Kid- A scrapper, like did you fight a lot?
- I'm going to throw up inside my stomach.
- My name means I hate books and I love video games.
- A girl showed us a picture of her kissing a seal over break. The kids replied to her, "Don't get a boyfriend like that! You don't want ugly seal babies!"
- After recess-- I'm having a seizure! Me- If you are having trouble breathing, it may be asthma. Kid 2- Do you smoke? Kid 1- I don't smoke weed and that stuff. My grandma smokes and I have had 2nd hand smoke since I was 5. Kid 2- Do they have a bottle with a big cigarette in it?
Spring
Even though the weather doesn't feel like spring, I can be hopeful, right?
I cut out letters and ironed them to the back of my Lucky banner.

I cut out letters and ironed them to the back of my Lucky banner.
Wednesday, March 20, 2013
Duvet Dye Job
After I finished painting my bedroom, I really wanted new bedding. However, bedding is not cheap! I decided that I was going to dye my duvet cover and pillow shams. I bought 2 bottles of liquid RIT dye in fuchsia. I had great plans of avoiding the washer and doing it in a Rubbermaid tub and hanging it out to dry outside. However, cold weather, and Morgan convincing that the washer would be OK, I did it in the washer. I'm glad I did, because I could see it being a huge mess!
First, I filled the washer with hot water, enough to cover the fabric. Next, I added the fabric, and made sure it was all wet. Then, I added the whole bottle of dye. (The first time, I just did the pillow cases, and attempted the curtains, more on that later.) The first time I also used my hand to mix, without a glove, and my hand turned pink! Then you mix it up making sure that the dye is covering all of the fabric. Turn the washer on, and let it run, till you hear it start to drain, and reset it. The fabric should be in the washer for at least 30 minutes. After 30 minutes in the hot water, you can let the washer run its normal course. Then run it again, on warm water, with detergent. Take it out of the washer and dry it. Now your washer... it will be pink! Or what ever color you dyed your material. So it is time to bleach it! Add 1 cup bleach and detergent, like you would a normal load, and let it run its cycle.
Notes:
The duvet, was not near as dark as the pillow case, so I did it twice. The first time I used 1 whole bottle. The 2nd time, after a run to Hobby Lobby, I did 1 1/2 bottles. I wish I would have done 2! It needs a lot, because there is a lot of fabric!
The curtains, did not turn out dark pink, they are more of a baby pink. I think with that type of fabric you have to add salt or something to them to make it stick! My duvet was cotton, and it worked just fine!
I did notice when I put the duvet, after it had been washed and dried, back in the washer with the hot water, the dye was seeping out, and the water was pink. So when you wash it for normal cleaning, wash it alone!! At least for the first few times.
Sunday, March 17, 2013
Spring Break & March Madness
Taking a little break to enjoy my Spring Break and March Madness!
Rock Chalk Jayhawk!!


Rock Chalk Jayhawk!!
Wednesday, March 13, 2013
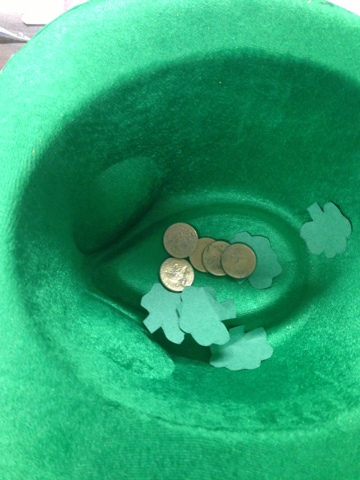
Leprechaun Traps
When I was in 2nd grade, my teacher, Mrs. Power had us make leprechaun traps right before St. Patrick's day. Every year after that my sisters and I enjoyed making them. Hopeful we would catch one, usually we only got green milk and a mess!
When I started teaching, I had my kids make them too. We write a first, next, last story to go with our traps. It's a fun thing to do right before spring break and right after our big tests! Here are a few in the making, please excuse the blurry pics, I had a kid take them!


When I started teaching, I had my kids make them too. We write a first, next, last story to go with our traps. It's a fun thing to do right before spring break and right after our big tests! Here are a few in the making, please excuse the blurry pics, I had a kid take them!
Tuesday, March 12, 2013
Turkey Meatloaf
I sorta made this up, based on ingredients available in my pantry, fridge, and freezer. I wanted to make Miranda Lambert's meatloaf, but didn't have everything I needed! So I went for some of the flavors they had, and mixed them with what I had!
Ingredients: (Loaf)
1/2 onion, diced
1/2 c. ketchup
1 c. Italian bread crumbs
1 T mustard
1/4 c. brown sugar
2 lbs ground turkey
1 egg
salt
pepper
Sauce:
1/2 c. ketchup
3 T brown sugar
Preheat oven to 350*. Mix first 9 ingredients together, mix well using your hands! Place in greased loaf pan. Mix up sauce, and spread over loaf. Bake for 1 hour.
Monday, March 11, 2013
Lucky Banner
I whipped up this banner, using scraps of fabric that I had at home.
I cut 6 pendants, by hand, using a simple pattern I made out of paper.
I made them have a double thickness, because I want to add SPRING to the other side, after St. Patrick's day is over.
After they were cut out, I sewed them together, and left a little spot at the top, so I could thread the string thru the top.
Next, I used my handy-dandy Silhouette Cameo to cut out LUCKY on green fabric, backed with Wonder Under.
I used a font called "Luck of the Irish" and a shamrock that I traced.
When cutting fabric with your Silhouette, it is a good idea to use the fabric blade, and select double cut. Finally, I used a safety pin to thread some twine thru the top!

Friday, March 8, 2013
Thursday, March 7, 2013
Marshmallow Shooters
I like to give the kids a fun activity to do in Science during testing week. This year, I took them to the gym to practice measuring with marshmallow shooters!
I already had the marshmallow shooters made from this years winter party. So we skipped the making of them step.
First, they had to write a hypothesis predicting what would happen if they shot the marshmallow.
Then they got to shoot! They LOVED this! Once they had all of their trials finished, I let them play games. Get it in the basketball goal, get it in your mouth, dodge ball (with a slight eye injury!), competitions for different things, target practice, etc.
Here is the lesson plan that I wrote for a Science Pioneers Class:
Title: MeasuringMarshmallows
Author: AprilCremer
Subject Area(s):Science and Math
Grade(s): 4-6
Description ofLesson: Students will measure the distance a marshmallow is shot usingmeters and centimeters
Length of Lesson:45 minutes
Student Objectives:
The students will be able to accurately measure distance tothe nearest centimeter using a meter stick.
Materials:
Marshmallows, marshmallow shooter (cup with balloon taped tothe bottom), meter stick, video found at http://www.youtube.com/watch?v=IhtgKHYZti0,assessment found http://www.funbrain.com/cgi-bin/meas.cgi?A1=s&A2=1&A3=2
Procedure:
1. Show students the videohttp://www.youtube.com/watch?v=IhtgKHYZti0 and discuss the different reasons wemeasure things. Discuss how we wouldmeasure distance. What tools would weuse? What measurement would we use?
2. Build marshmallow shooters- Cut off the bottom of a papercup. Tie a knot at the end of your balloon. Cut off the top of the balloon.Stretch the balloon over the hole that you cut in the cup. Tape the balloon on with duct tape.
3. Demonstrate how the shooters work and discuss the rulesof shooting (no shooting at people, etc.). Demonstrate how to accurately measure distance using a meter stick. Allow for a few practice rounds, so they canfigure out how they shoot. I found that the large marshmallows do not bouncearound as much and are easier to have a more exact measurement.
4. Have students stand at a line with their partner andshoot the marshmallow. The partner willmark where the marshmallow lands. Together they will use meter sticks to record the distance themarshmallow went.
5. Allow for 3-5 trials, recording the measurement each timeon a data table.
ScientificExplanation:
This is an introduction to the metric system, which is usedby scientists and in most countries around the world.
Assessment:
Students will be assessed by playing this game on themedium/hard level (depending on the grade:) http://www.funbrain.com/cgi-bin/meas.cgi?A1=s&A2=1&A3=2
They must get 80% correct to complete the game successfully.
Missouri and KansasStandards Addressed:
Kansas ScienceStandards:
Standard 1, Benchmark 1: The student will demonstrateabilities necessary to do the processes of scientific inquiry.
Standard 1, Benchmark 2. designs and conducts scientificinvestigations safely using appropriate tools, mathematics, technology, andtechniques to gather, analyze, and interpret data.
Missouri ScienceStandards (GLE’s):
Strand 7.1, Concept B. Scientific inquiry relies upongathering evidence from qualitative and quantitative observations
Strand 7.1, Concept B: (6th Grade) d. Measure length to thenearest millimeter, mass to the nearest gram, volume to the nearest milliliter,temperature to the nearest degree Celsius, force (weight) to the nearestNewton, time to the nearest second
Resources:
http://www.youtube.com/watch?v=IhtgKHYZti0
Photographs of another version and directions formarshmallow shooter:http://www.cometogetherkids.com/2011/09/mini-marshmallow-shooters-or-pom-pom.html
Note: I found that the paper cups with duct tape held up thebest. The plastic cups were harder tocut, and bent/cracked.
Wednesday, March 6, 2013
Quiche aka the Recipe with NO MEASUREMENTS!
Don't you love when your friends send you recipes? I always like ones that are tried-and-true! I got this one from one of my friends, who got it from a friend, who got it from a friend... She ate it for dinner, and raved about her breakfast leftovers the next day.
However, this recipe, had NO measurements! Good thing I know how to cook, otherwise, this could have ended up as a hot mess! Here is the version I got:
 Attached is a pic of the quiche recipe. The basis of it is a pie crust, 5 eggs and 2/3 cup of almond milk, cook for 45 min at 375.
You can add ingredients to it to add additional flavor. Below is what I did this morning.
1 pie crust, thawed (mine was gluten free from Whole Foods)
5 eggs
2/3 cup almond milk
Fresh basil
Fresh garlic
Olive oil
Chili powder
Garlic powder
Rosemary
Pepper
Sea salt
Ground turkey
Spinach, briefly sautéed in olive oil, basil and sea salt.
Sun dried tomatoes, cut Julienne style in a jar, from Trader Joes
Goat cheese crumbles (from TJ)
1. Cook ground turkey with garlic, basil, and rosemary
2. Briefly sauté spinach with fresh basil and a little bit of sea salt in olive oil
3. Layer spinach mixture on the thawed pie crust
4. Then add a layer of sun dried tomatoes followed by crumbled goat cheese
5. Then add a layer if ground turkey
6. Whisk 5 eggs, then add 2/3 cup almond milk
7. Add in a bit of garlic powder, chili powder, sea salt and pepper. Whisk everything again then pour egg mixture into pie crust. Season the top with a tad of chili powder, sea salt and pepper
8. Cook at 375 for 45 min.
Note, depending in the size of your pie crust or any cracks, the mixture may overflow the crust. Thus, I always cook the quiche on top of a cookie sheet.
So here is the "April" version. I changed a few things, part of which because my grocery store is going thru a remodel and I can't find ANYTHING!
Ingredients:
Directions: (these are pretty much the same!)
1. Cook ground turkey with garlic, basil, and rosemary
2. Briefly sauté spinach with fresh basil and a little bit of sea salt in olive oil
3. Layer spinach mixture on the thawed pie crust
4. Then add a layer of roasted red peppers, followed by feta & goat cheese
5. Then add a layer if ground turkey
6. Whisk 5 eggs, then add 2/3 cup almond milk
7. Add in a bit of garlic powder, chili powder, sea salt and pepper. Whisk everything again then pour egg mixture into pie crust. Season the top with a tad of chili powder, sea salt and pepper
8. Cook at 375 for 45 min.

However, this recipe, had NO measurements! Good thing I know how to cook, otherwise, this could have ended up as a hot mess! Here is the version I got:
Attached is a pic of the quiche recipe. The basis of it is a pie crust, 5 eggs and 2/3 cup of almond milk, cook for 45 min at 375.You can add ingredients to it to add additional flavor. Below is what I did this morning.
1 pie crust, thawed (mine was gluten free from Whole Foods)
5 eggs
2/3 cup almond milk
Fresh basil
Fresh garlic
Olive oil
Chili powder
Garlic powder
Rosemary
Pepper
Sea salt
Ground turkey
Spinach, briefly sautéed in olive oil, basil and sea salt.
Sun dried tomatoes, cut Julienne style in a jar, from Trader Joes
Goat cheese crumbles (from TJ)
1. Cook ground turkey with garlic, basil, and rosemary
2. Briefly sauté spinach with fresh basil and a little bit of sea salt in olive oil
3. Layer spinach mixture on the thawed pie crust
4. Then add a layer of sun dried tomatoes followed by crumbled goat cheese
5. Then add a layer if ground turkey
6. Whisk 5 eggs, then add 2/3 cup almond milk
7. Add in a bit of garlic powder, chili powder, sea salt and pepper. Whisk everything again then pour egg mixture into pie crust. Season the top with a tad of chili powder, sea salt and pepper
8. Cook at 375 for 45 min.
Note, depending in the size of your pie crust or any cracks, the mixture may overflow the crust. Thus, I always cook the quiche on top of a cookie sheet.
So here is the "April" version. I changed a few things, part of which because my grocery store is going thru a remodel and I can't find ANYTHING!
Ingredients:
- 1 pie crust, thawed
- 5 eggs
- 2/3 cup skim milk
- 3-4 leaves basil
- 2 cloves minced garlic
- Drizzle of Olive oil
- 1/4 t. Chili powder
- 1/4 t. Garlic powder
- 1 sprig fresh Rosemary
- 1/4 t. Pepper
- 1/4 t. Sea salt
- 1/2 lb. Ground turkey (Italian style)
- 1/2 cup frozen Spinach, defrosted, drained, and briefly sautéed in olive oil, basil and sea salt.
- 1/3 cup feta cheese
- 1/3 cup goat cheese (had an oops and bought honey style, so I didn't use the whole thing, and added feta to supplement)
- 4-5 strips of jarred roasted red peppers
Directions: (these are pretty much the same!)
1. Cook ground turkey with garlic, basil, and rosemary
2. Briefly sauté spinach with fresh basil and a little bit of sea salt in olive oil
3. Layer spinach mixture on the thawed pie crust
4. Then add a layer of roasted red peppers, followed by feta & goat cheese
5. Then add a layer if ground turkey
6. Whisk 5 eggs, then add 2/3 cup almond milk
7. Add in a bit of garlic powder, chili powder, sea salt and pepper. Whisk everything again then pour egg mixture into pie crust. Season the top with a tad of chili powder, sea salt and pepper
8. Cook at 375 for 45 min.
 |
| Rosemary, the herb that lives all year! |
 |
| The quiche went on a little adventure to the neighbors to get heated up! Snow day fun! |
Tuesday, March 5, 2013
Roasted Veggie Sandie
These veggies would be a great side, all by themselves, but I decided to put them on a sandwich! You could mix up the veggies and toppings more than I did, but I went SIMPLE!

 To make the sandwich, I spread goat cheese on my favorite Costco bread, and then added the veggies and a drizzle of balsamic glaze.

Ingredients:
1 red pepper
1/2 red onion
3 portabella mushrooms
1/4 c. olive oil
2 T balsamic vinegar
1/2 t. salt
1/2 t. pepper
1 sprig fresh rosemary, chopped
Directions:
Preheat oven to 475* - Chop all veggies in large pieces. Coat veggies in olive oil, balsamic, salt, pepper, and rosemary. Place veggies on foil lined pan in a single layer. Bake for 15 minutes, and then flip, and cook for another 5-7 minutes. (The mushrooms shrink up a lot, you might want to keep them separate, and add them in for the last 7 min or so.)

**you could add pesto, chicken, feta, or switch up the bread to make your own sandie!**
Monday, March 4, 2013
Lemon Chicken with Roasted Potatoes and Green Beans

Ingredients:
Directions:
 Preheat oven to 450.
Coat a large baking dish with 1 tablespoon olive oil.
Arrange lemon slices from 1 lemon in a single layer on the bottom of the dish.
In large bowl combine remaining olive oil, lemon juice of 2nd lemon, garlic, salt and pepper.
Add green beans and toss to coat.
Using tongs, remove green beans and arrange them on top of lemon slices.
Add potatoes to same olive oil mixture and coat. (I found that if you do this, then there is not enough marinade left for the chicken, so I coat the potatoes in olive oil, salt, &pepper.)
Arrange on inside edge of dish on top of the beans.
Place chicken in olive oil mixture and coat. (let sit for 5-10 minutes)
Place chicken in dish. Pour remaining marinade over chicken.
Sprinkle whole dish with
Roast for 40-50 minutes. (It smells sooo good!)
Remove chicken and continue roasting potatoes/beans if necessary.
- 6-8 tablespoons olive oil
- 2 lemons, 1 thinly sliced, 1 juiced
- 4 cloves garlic
- 1 teaspoon salt
- 1/2 teaspoon ground pepper
- 3/4 lb green beans (canned or fresh)
- 8 small red potatoes, quartered
- 2-4 chicken breasts
- Sprinkle of Ruth Ann's Muskego Ave Chicken and Fish Seasoning from Penzey's it is a mixture of salt, black pepper, garlic, lemon peel, and onion.
Directions:
 Preheat oven to 450.
 Coat a large baking dish with 1 tablespoon olive oil.
Arrange lemon slices from 1 lemon in a single layer on the bottom of the dish.
In large bowl combine remaining olive oil, lemon juice of 2nd lemon, garlic, salt and pepper.
Add green beans and toss to coat.
Using tongs, remove green beans and arrange them on top of lemon slices.
Add potatoes to same olive oil mixture and coat. (I found that if you do this, then there is not enough marinade left for the chicken, so I coat the potatoes in olive oil, salt, &pepper.)
Arrange on inside edge of dish on top of the beans.
Place chicken in olive oil mixture and coat. (let sit for 5-10 minutes)
Place chicken in dish. Pour remaining marinade over chicken.
Sprinkle whole dish with
Roast for 40-50 minutes. (It smells sooo good!)
Remove chicken and continue roasting potatoes/beans if necessary.
Adapted from Kelly's Korner Recipes
 |
| Little tip: Keep cut potatoes in water to keep them from turning brown. |
Saturday, March 2, 2013
Pink Gallery Wall
I have painted my room a new grey color and needed some decorations! I started looking on Pinterest and found a few that I liked. I knew I could replicate them. I started scrounging around my house, and made a few trips to Hobby Lobby. I made the ampersand, the She Believed, and used an old Birch Box box to create this arangement.
First I started off with everything I had and started moving them around on my bed.


First I started off with everything I had and started moving them around on my bed.


Then, when I thought I had it, I hung it up. Still needing my gold antlers.

Here are the final pictures. I LOVE it!


From Left to right, top to bottom...
1. Crown made of gold fun foam taped on a Birch Box lid
2. Antlers
3. Pink Frame from Hobby Lobby
5. Ampersand
6. My "Chair" senior picture
7. A from Marshalls
8. Black Picture frame - might find a new picture for this one
9. Light switch- still needs a gold frame around it.

Subscribe to:
Posts (Atom)